Channels in Microsoft Teams
Organizations Microsoft Teams provide for the division into teams – these are groups of users united by a certain goal, for example, the completion of the same project, the search for the necessary information, etc. And within these teams there can be several separate cells at once, which are called channels. Why do we need such channels in Microsoft Teams and how to use them? Detailed information on these issues will be described in this article.
Details
It’s worth starting with the fact that only members of a certain commands. Moreover, access to them can also be limited, then the admin will need to manually send out invitations. They have their own chat, file storage, the ability to add various tabs, for example, responsible for a specific type of document (Excel, PowerPoint, Word, etc.), a wall with publications, and a button to quickly launch a meeting.
Now you should understand what a channel is in the MS Teams structure. Now let’s deal with its creation, adding users, editing and deleting.
Create
Instruction for PC:
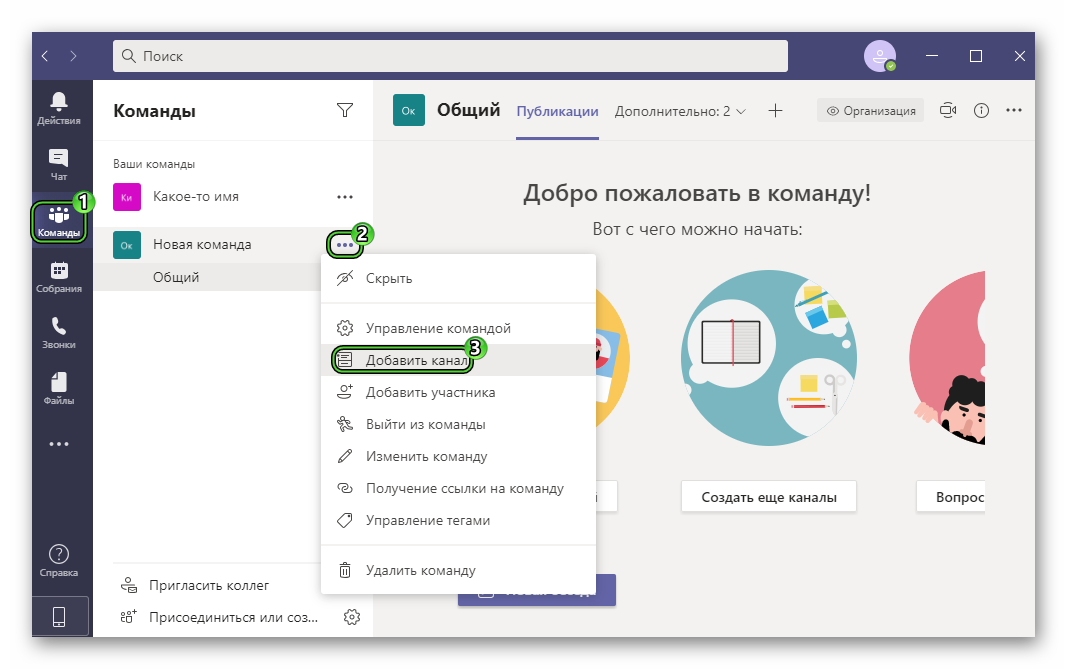
- In the Tims program window, go to the Commands tab.
- Click on the dot icon next to the desired command name.
- From the context menu, select “Add…”.
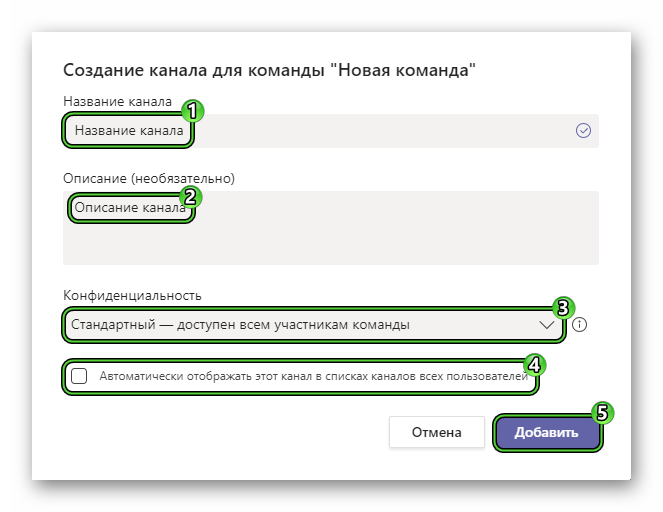
- Enter a title in the top field, optionally fill in “Description”.
- In the “Privacy” section, you need to select the type of room: “Standard” – any member of the team can enter, “Closed” – they can enter only certain users. It cannot be changed in the future.
- Optional, enable the option “Automatically display this…”.
- Click the “Add” button.
Instructions for mobile devices:
- Launch the Teams app on your phone or tablet.
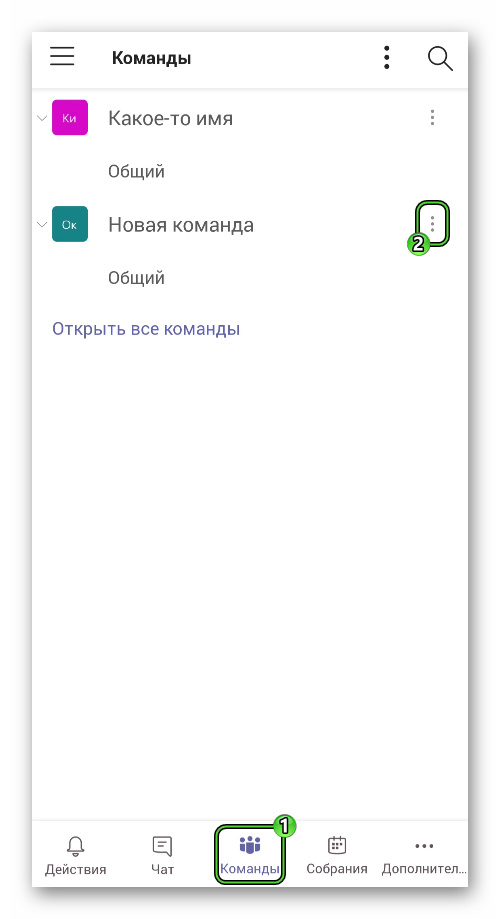
- Go to the Commands tab on the bottom panel.
- Tap the icon with dots next to the appropriate group.
- Select the Manage Channels option from the context menu.
- Click on the plus sign in the purple stroke.
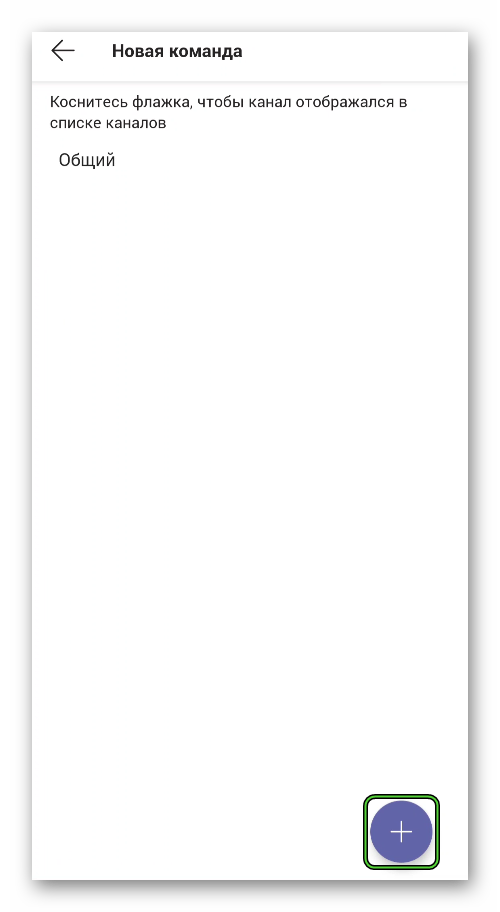
- Fill in all the fields as in the previous instruction.
- Click on the tick in the top right corner.
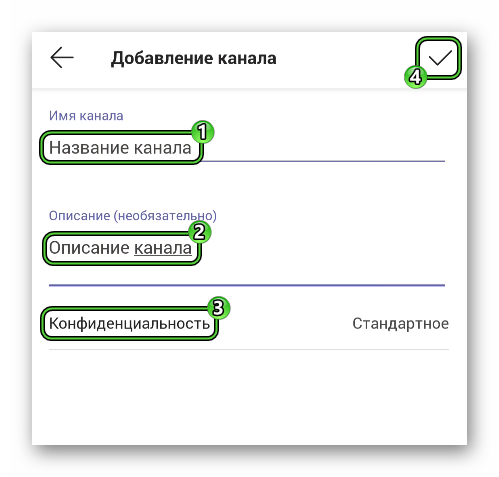
We figured out how to create a channel in Microsoft Teams. Now let’s add other people to it.
Invite participants
This procedure is only required for closed rooms. As soon as you add them, a characteristic window will appear. In it, you need to specify the necessary users who are in the same team, and then click on the confirmation button. This action is available on all devices. Of course, people can be invited later.
Instruction for PC:
- Hover over a private channel.
- Left click on the dot icon that appears.
- Choose “Add…” from the menu that appears.
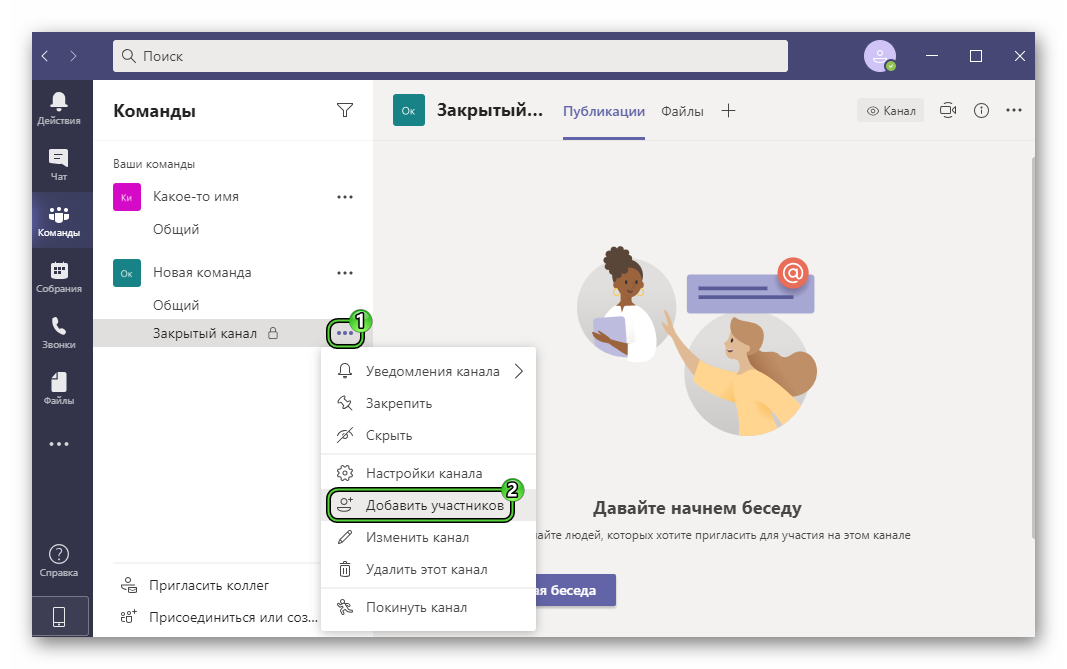
- Specify the desired users in the text box. You can use names and email addresses to search.
- Click the add button.
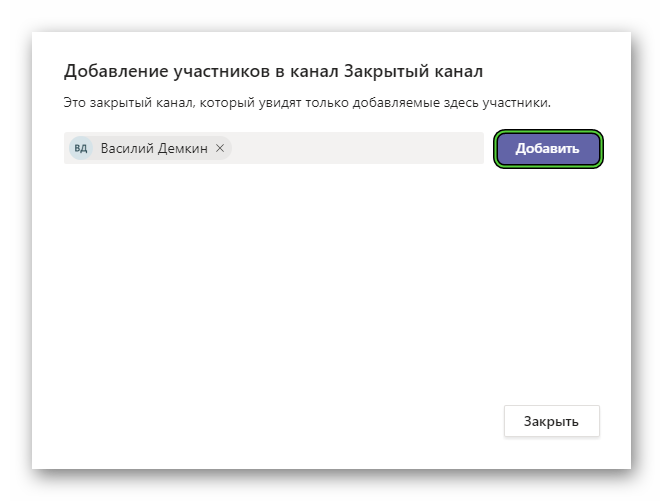
Instructions for mob. devices:
- In the Commands tab, tap on the required entry.
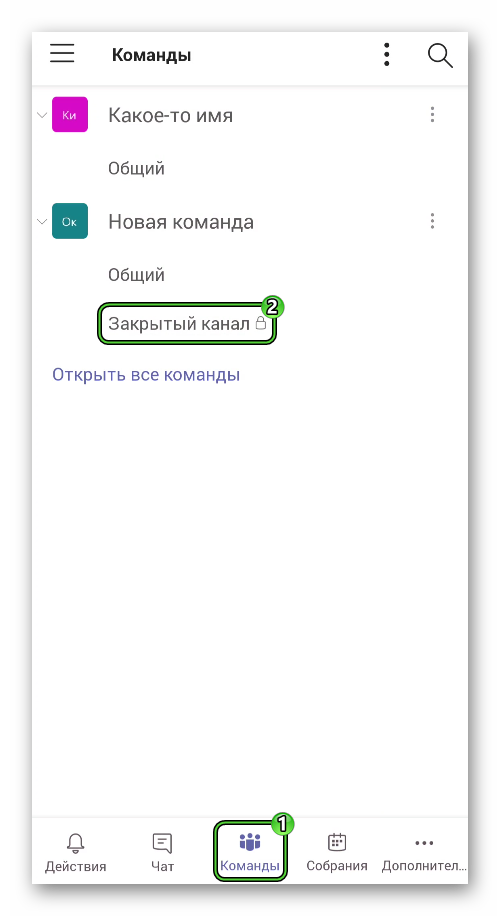
- Next, tap on the context menu icon.
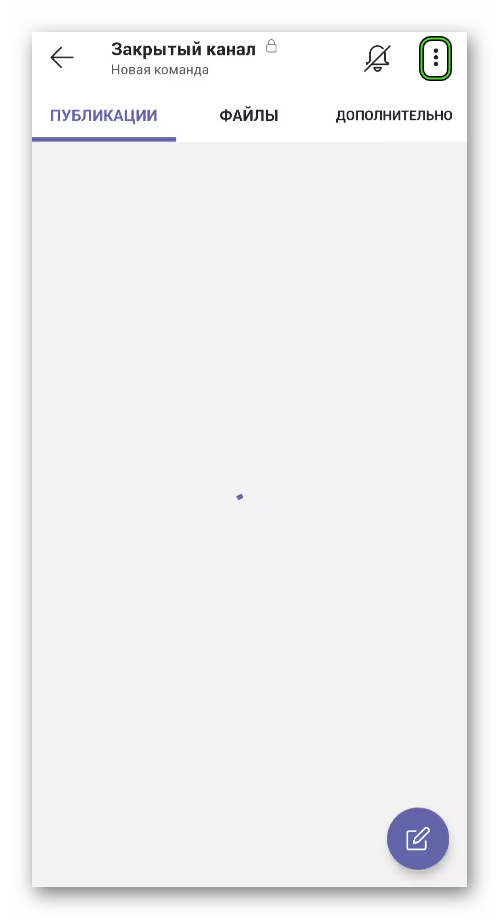
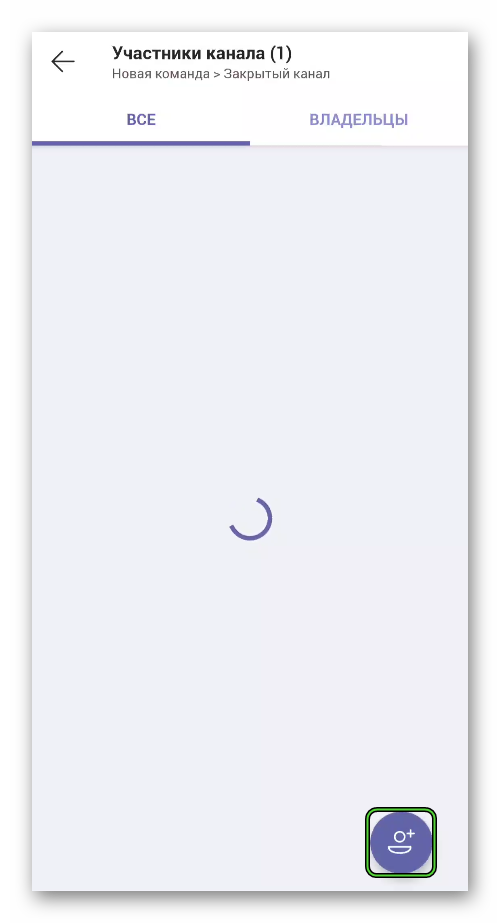
- Select Manage Members.
- Click the purple icon in the lower right corner.
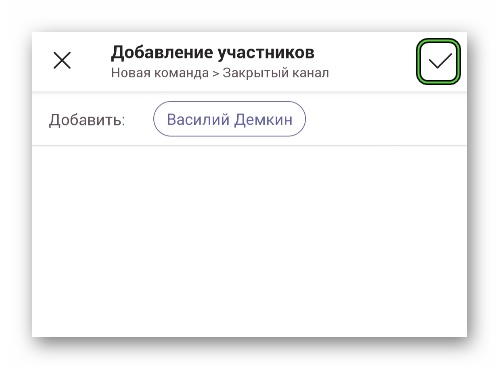
- Tick the desired users from the list or find them through the search form. You can specify names and email addresses.
- Tap the tick at the end to send invitations.
If the room is open, then anyone from the list of team members can get there.
Editing
Unfortunately, changing the channel type in MS Teams will not work. For some reason, the developers did not add this feature. The only solution is to delete it and recreate it.
Delete
PC Manual:
- Open the channel page in the program window.
- Click the menu icon in the corner.
- Select the delete item.
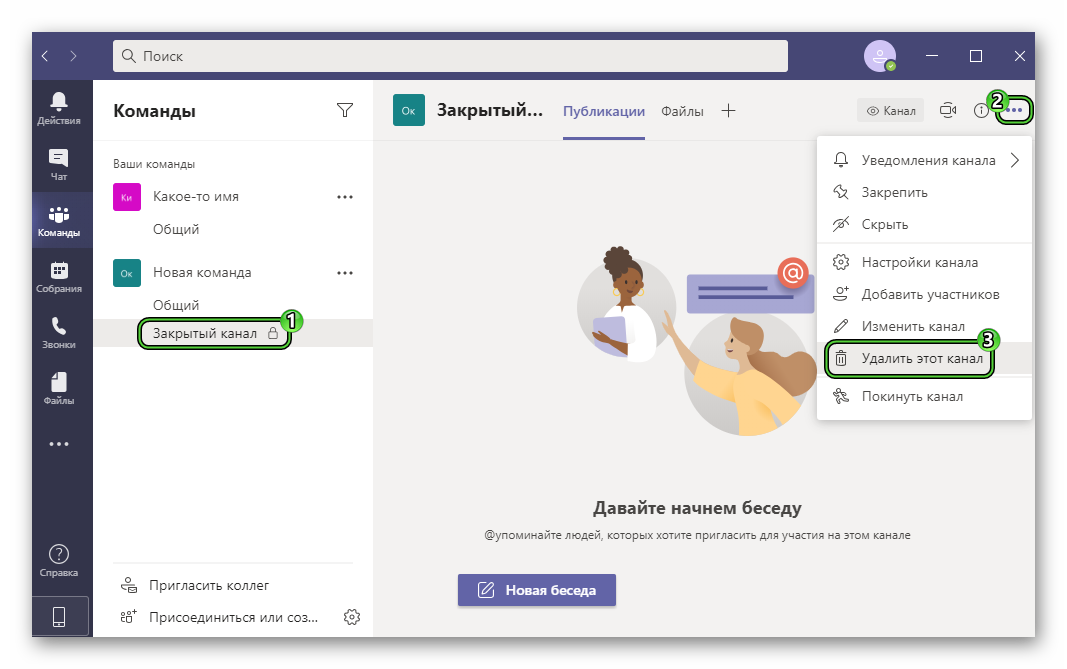
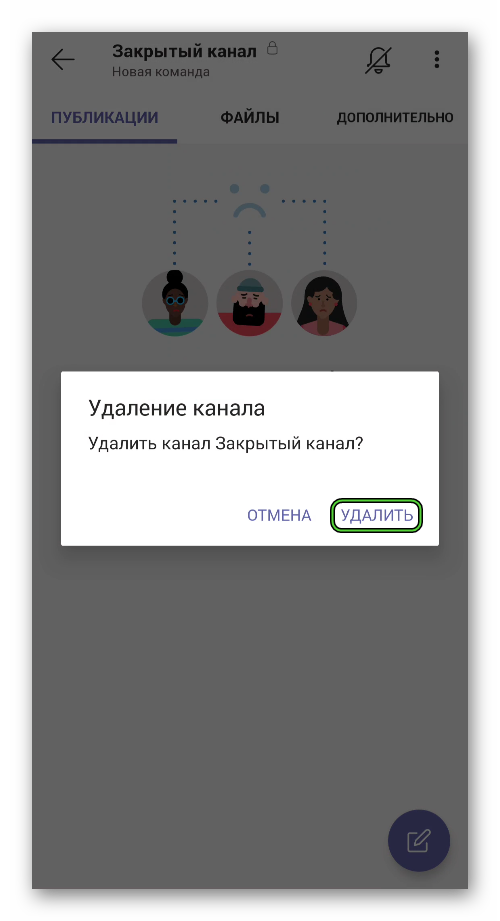
- Press the purple button on the confirmation form.
Guide for smartphones and tablets:
- Go to the channel page from the central tab of the Teams app.

- Click the menu icon (three dots) in the corner of the screen.

- Select the penultimate item from the list that is responsible for deletion.
- Confirm your decision by clicking on the appropriate button.
