Teams in Microsoft Teams
Teams in Microsoft Teams is a convenient way to divide the members of an organization into different “cells”, each of which can have its own task, project, responsibilities etc. That is, this function has a lot of application scenarios. But the general essence is always the same – the association of certain users for some purpose. This article will show you how to use this feature in Microsoft Teams.
Manual
First, we will look at how to create different teams within the same organization, then we will talk about inviting users to it and how a person can go there on their own. And at the end of the article, we will mention the possibility of exit and complete removal.
Create
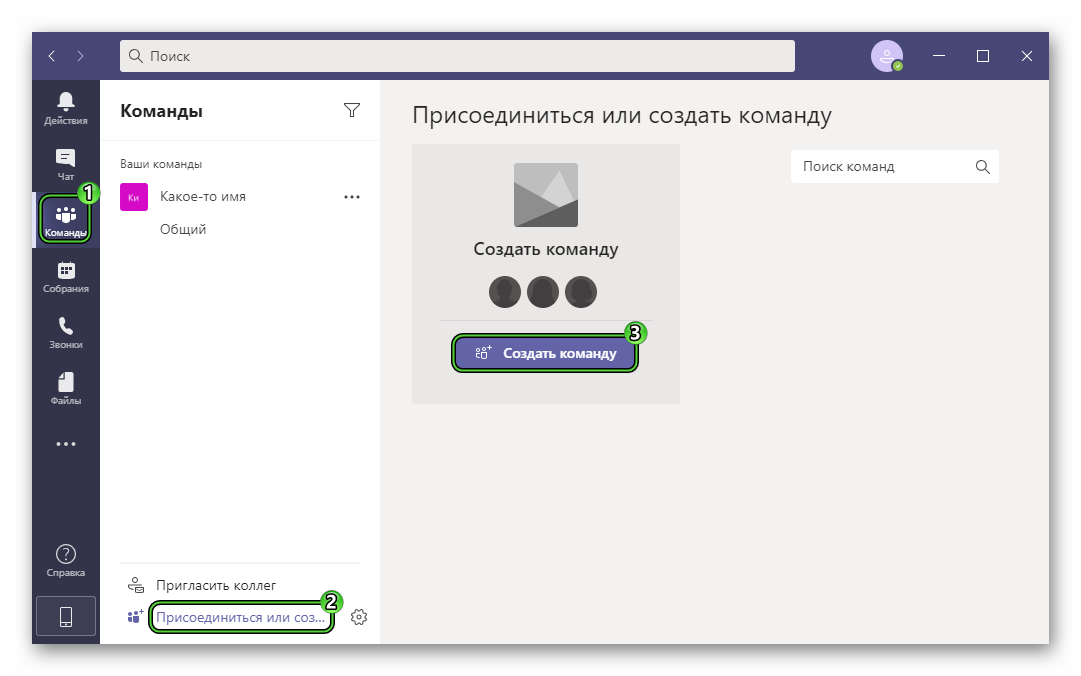
To get started, an admin or trusted user must create a team in Microsoft Teams. To do this, follow these steps:
- Maximize the main program window.
- Go to the tab with the same name using the left side menu.
- Click on “Join or Create…” at the bottom of the page.
- Hover over the Create command block.
- And then click on the purple button.
- Now select the top option (from scratch).
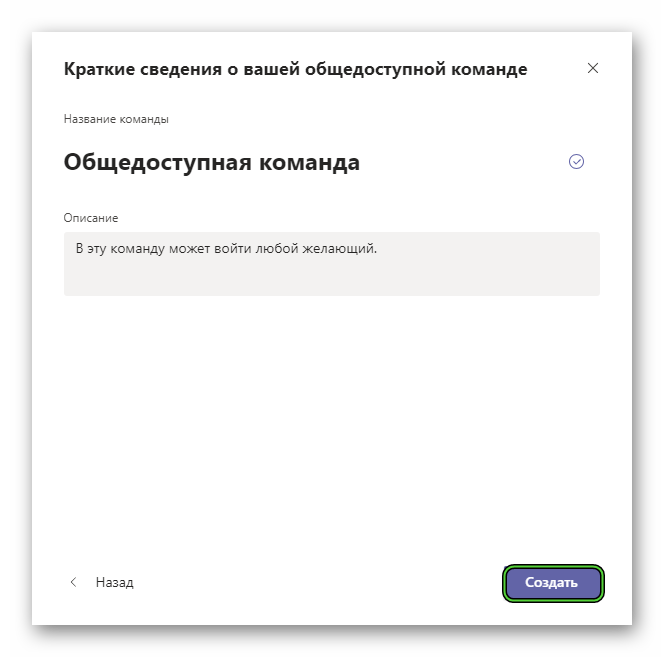
- Specify one of three types: “Private”—requires an invitation to sign in, “Public”—any member of the organization can sign in, “Entire organization” – all members of the organization are immediately added to it.
- Enter a concise title and a more detailed description just below.
- Click on the “Create” button.
Once the process is complete, a user invitation window will appear. Let’s deal with this in more detail.
Within one team, you can create chats, make various publications, upload any files, or add a division to channels.
Add members
In the text box, enter the names of the users you want to add. And then click on the prompts with the desired entries. You can also enter a mailing list, a security group, or the email address of a person from another organization (he will enter as a guest) here. Then click on the “Add” button.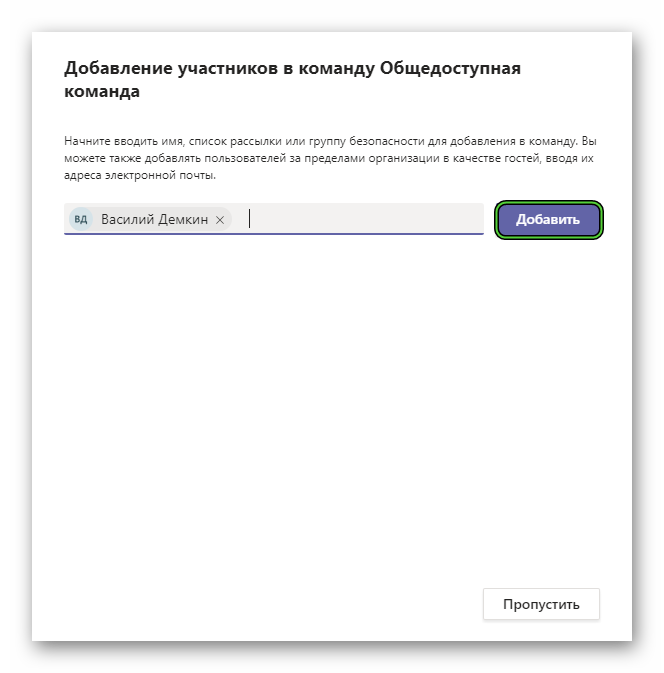 Close this window at the end.
To view team members in Microsoft Teams, do the following:
- Go to the tab of the same name in the program.
- Click on the icon with three dots next to the command you are interested in.
- In the context menu, select “Manage…”.
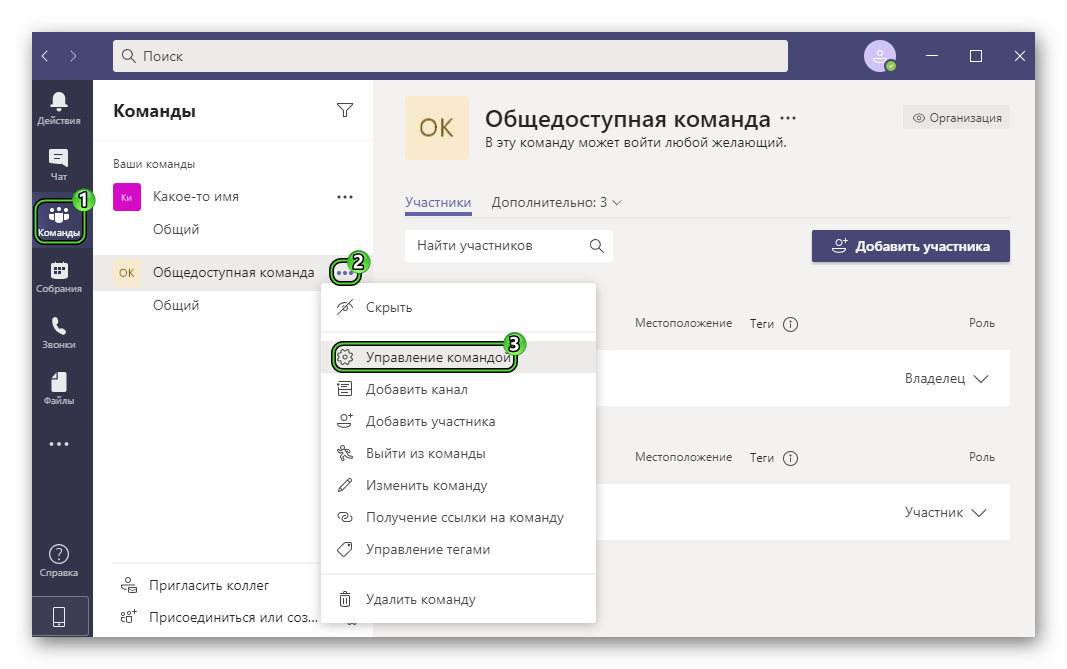
On the page that opens, you will see a list of participants. Please note that all users are divided into three categories:
- Owner is the role with maximum rights.
- Contributor is a limited role.
- Guest – Assigned to users from other organizations.
On the same page, you can invite other users using the corresponding function.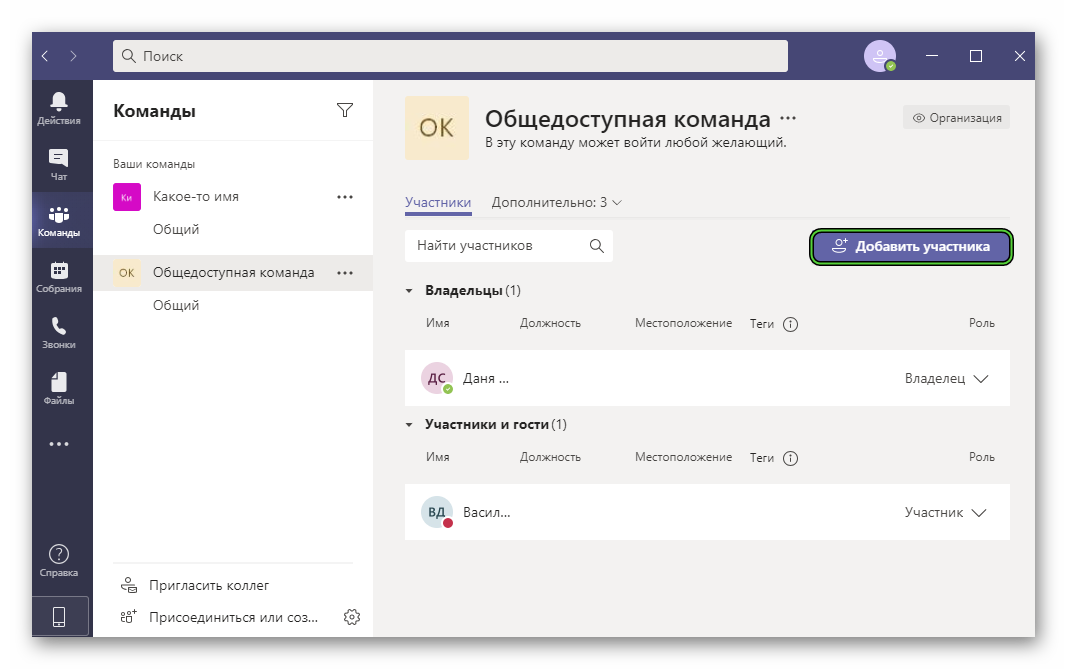
Connection
The user will not be able to join the Microsoft Teams team on their own. A trusted participant must invite him on his own. The corresponding instruction is described in the previous section.
Exit
You can leave a team in Microsoft Teams in a few simple steps:
- Go to the same tab using the side menu.
- Click on the ellipsis icon next to the desired entry.
- Select “Exit Team…”.
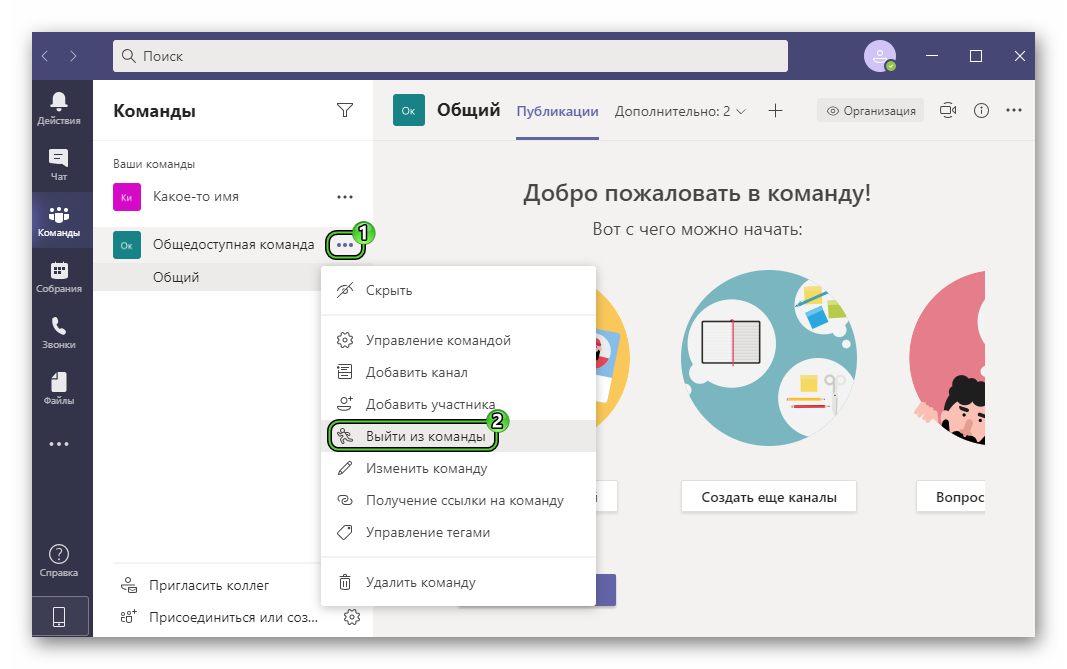
- Press the purple button to confirm.
Delete
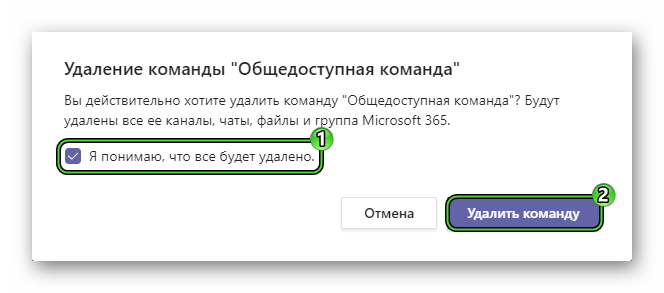
The owner of the team can delete it without any difficulty. True, it should be borne in mind that all data from it will be erased, and irretrievably. This applies to channels, chats, files, and a Microsoft 365 group. So it’s worth saving important information in advance.
Removal instructions.
- In the same section, right-click on the unwanted entry.
- Select the last option from the context menu that appears.
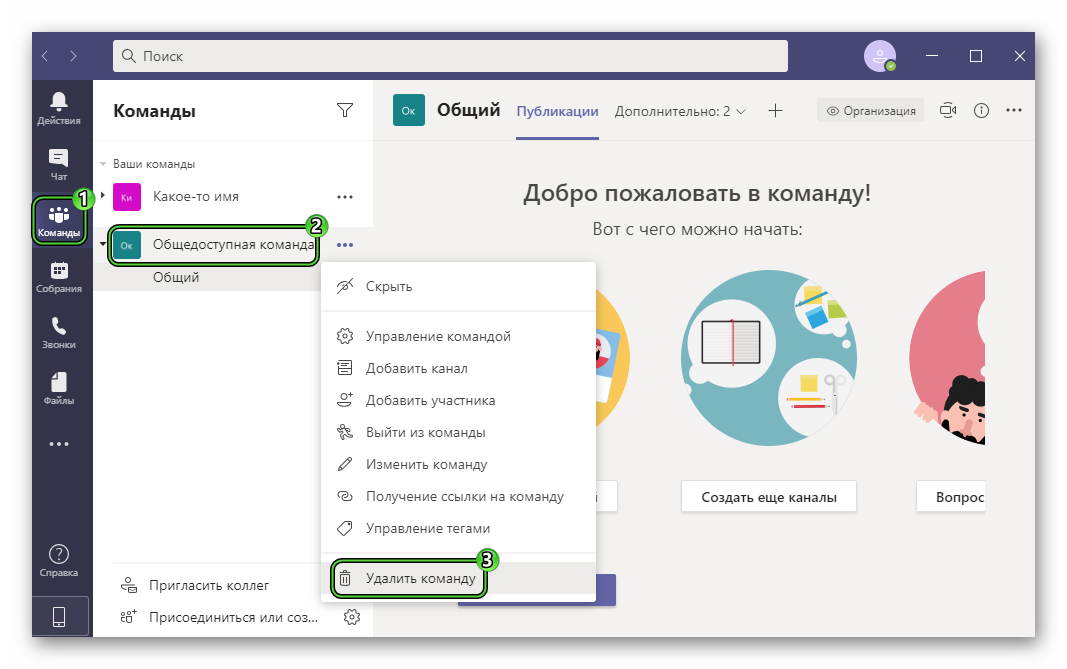
- Mark “I understand everything will be deleted”.
- Press the confirm button.
